Uncategorized
How to Sand Wood Properly

Jan
Sanding is one of those jobs that looks simple… until you end up with swirl marks, blotchy stain, or fuzzy edges.
Whether you’re working with our reclaimed scaffold boards or fresh timber, here’s our go-to method for getting a smooth, professional finish 👇
✅ The Golden Rule: Don’t Skip Grits
A good sanding job isn’t about sanding harder — it’s about sanding smarter, in stages.
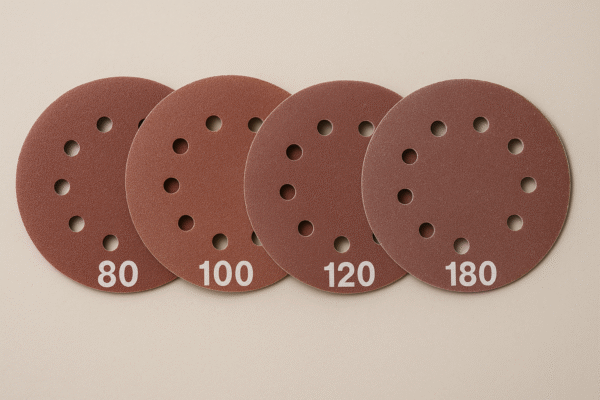
Here’s the grit guide we recommend for most projects:
🪵 Reclaimed Scaffold Boards (our most popular!)
These boards often have saw marks, old grain, dents, and character (that’s why we love them).
Start here:
-
40–60 grit = heavy flattening / removing old roughness
-
80 grit = smoothing out the scratches from the rough sanding
-
120 grit = perfect “ready for finishing” stage
-
180 grit = optional if you want a slightly softer feel
-
240 grit = only really needed for varnish or super-smooth modern looks
💡 Tip: Sanding too fine (like 240+) can actually make some oils/stains soak in less evenly.
🔧 Tools We Use (from basic to pro)
1) Sandpaper by hand (for small jobs)
Best for:
✅ edges, corners, touch-ups, and detail work
Use a sanding block if you can — it keeps pressure even and stops finger grooves.
2) Detail / Mouse Sander
Best for:
✅ corners, tight spaces, awkward shapes
Great little tool, but slower for big surfaces.
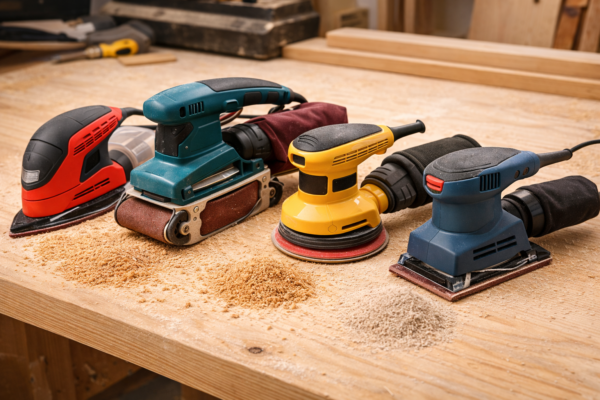
3) Random Orbital Sander (the best all-rounder)
Best for:
✅ table tops, shelves, boards, furniture panels
A random orbital gives the smoothest result without leaving visible scratch lines (as long as you don’t press down like a madman).
Top tip: Let the sander do the work. Light pressure = cleaner finish.
4) Belt Sander (use with care!)
Best for:
✅ heavy levelling on very rough boards
BUT… it can absolutely chew through wood fast and leave dips if you’re not careful.
If you’re new to sanding, we’d stick with orbital unless the board is really rough.
🧽 Dust Removal Matters More Than You Think
Dust gets trapped in scratches and ruins your finish.
After each grit:
✅ vacuum the surface
✅ wipe with a microfibre cloth
✅ tack cloth if you’re going ultra clean
And before oiling/staining? Always clean again.
⚠️ PPE (please don’t skip this bit)
Sanding reclaimed timber creates a lot of fine dust, and it’s not something you want in your lungs.
We recommend:
✅ Dust mask (P2 / P3 rated)
✅ Safety glasses
✅ Ear defenders (especially with orbitals or belt sanders)
✅ Gloves optional (but handy for splinters + handling rough boards)
If you’re sanding indoors: open windows + use extraction if possible.

🔥 Extra Tips to Avoid Common Mistakes
✅ Always sand with the grain (when hand sanding)
Orbitals are more forgiving, but hand sanding across grain will show up once you oil it.
✅ Don’t jump from 60 straight to 180
You’ll spend ages trying to remove deep scratches later.
✅ Don’t push hard
Pressing down causes:
❌ swirls
❌ uneven sanding
❌ clogged paper
❌ heat marks
✅ Change sanding discs sooner than you think
If it’s not cutting properly, it’s not “fine”… it’s just blunt 😄
✅ Round edges lightly
A sharp corner chips easily and won’t hold finish nicely. A quick 120 grit pass softens it perfectly.
🪵 Working With Reclaimed Boards? Expect Character
Our reclaimed scaffold boards often have:
✔ knots
✔ grain variation
✔ little dents & marks
✔ colour changes
That’s the charm — and sanding properly keeps the character while making it feel lovely and smooth.
If you want a “rustic but refined” finish, 120 grit is usually the sweet spot for scaffold boards.
Want Us to Cut Boards to Size or sand for 9you?
We stock reclaimed scaffold boards and other timber too — and we’re always happy to help you choose the best sanding + finish combo for your project.
📍 Kay Allan Timber Merchants
Message us what you’re making and we’ll point you in the right direction 👌
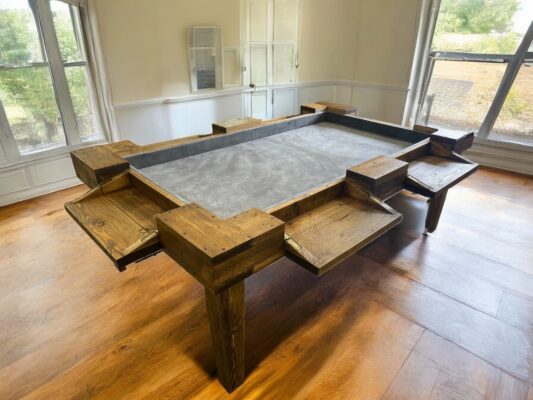
Check out an amazing project built with our wood from Vilted Gaming Tables!